UI
Einführung
8th Wall Studio bietet ein integriertes UI-System für die Erstellung interaktiver, benutzerfreundlicher Schnittstellen in Ihrem Erlebnis. Die UI-Komponente bietet eine Vielzahl von Bausteinen mit konfigurierbaren Eigenschaften, von Text und Bildern bis hin zu flexiblem Layout und anpassbarem Styling.
Hinzufügen von UI-Elementen
Sie können UI-Elemente mit verschiedenen Methoden einführen:
- Neues Primitiv: Verwenden Sie die Option (+) in der Hierarchie, um Voreinstellungen hinzuzufügen.
- Komponente hinzufügen: UI-Elemente an eine bestehende Entität anhängen.
- Skripting: Fügen Sie mithilfe der API programmatisch Elemente hinzu.
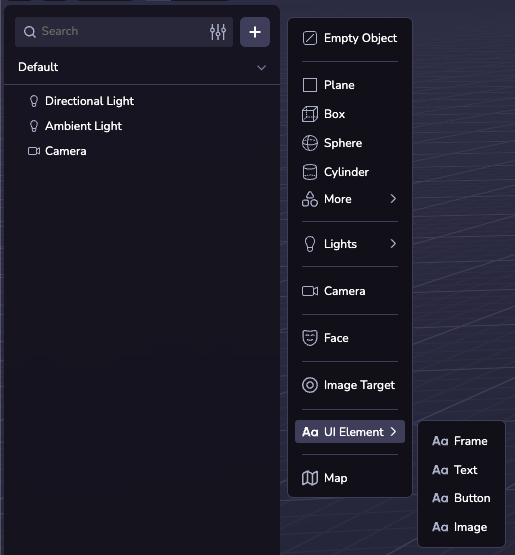
Die (+)-Menüoptionen sind alle Voreinstellungen der gleichen UI-Komponente und können alle mit dem UI-Inspektor gleich konfiguriert werden.
3D UI
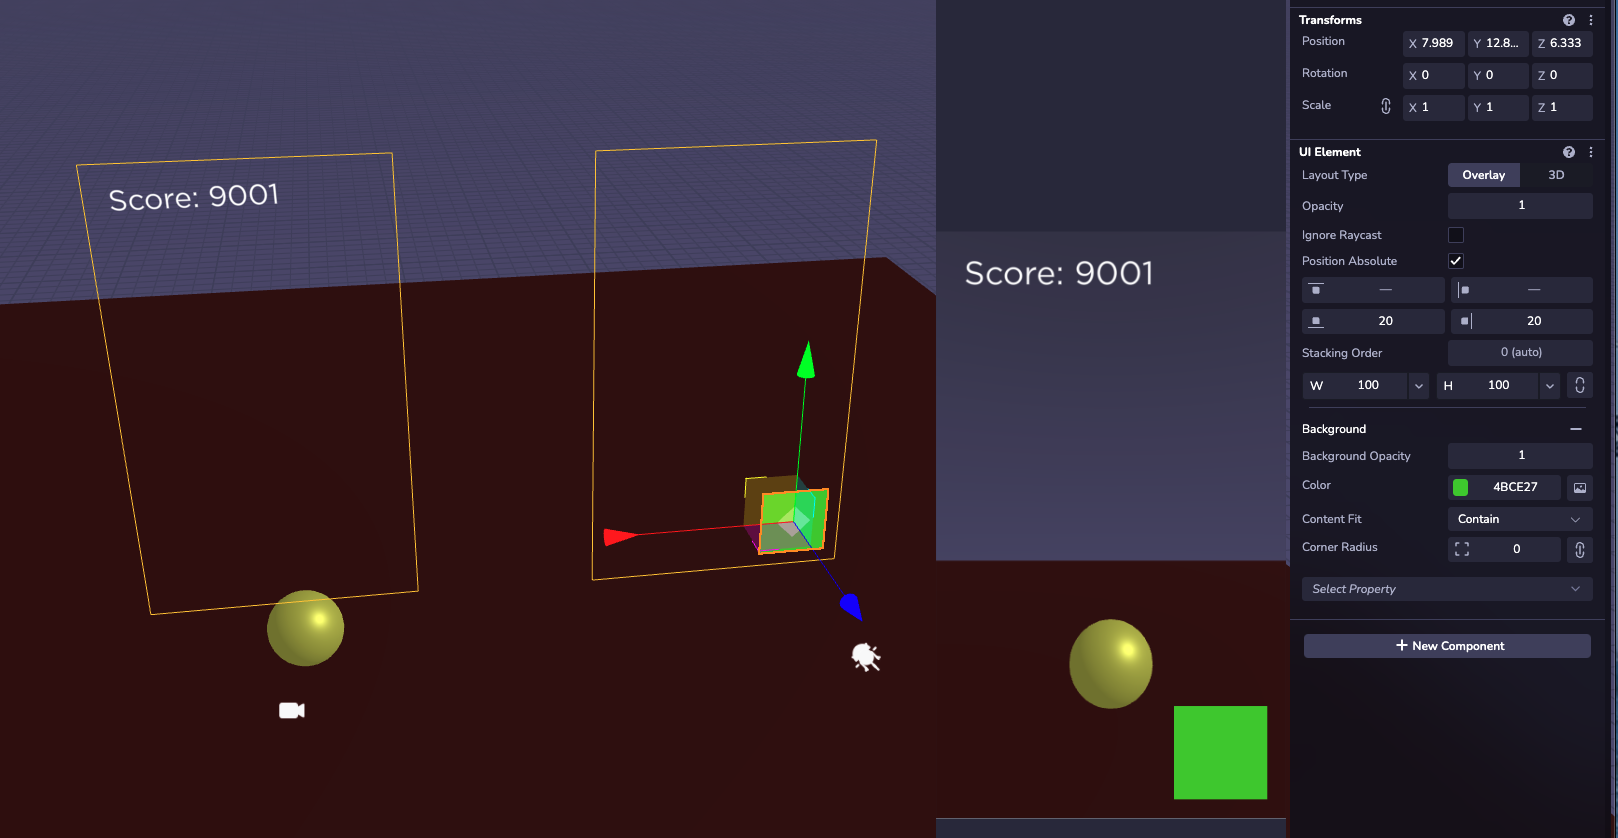
3D-UI-Elemente lassen sich nahtlos in Ihre 3D-Szene integrieren und ermöglichen so räumlich interaktive Darstellungen. Sie können mit dem Transformationsinspektor in der Welt positioniert werden und benötigen eine Breite und Höhe in Weltpixeln (1/100stel einer Welteinheit), z.B. '500'. Die Position eines untergeordneten UI-Elements wird vollständig durch die Layout-Eigenschaften des Elements und seines übergeordneten Elements bestimmt.

Overlay UI
Bei der bildschirmverankerten Benutzeroberfläche bieten Overlay-Elemente eine feste Positionierung auf der Leinwand. Größe und Positionierung können in Anzeigepixeln (z. B. '125') oder Prozentwerten (z. B. '30%') angegeben werden. Das Transfrom von Overlay-Oberflächenelementen der obersten Ebene dient lediglich der Organisation im Ansichtsfenster; ihre Position auf dem Bildschirm wird mit "Position: 'absolute'" gesteuert. Wie bei 3D werden untergeordnete Elemente relativ zu ihren übergeordneten Elementen positioniert.
Eigenschaften
Die UI-Komponente verfügt über zahlreiche konfigurierbare Eigenschaften. Im Inspektor des Ansichtsfensters sind sie nach Kategorien gruppiert und nicht immer sichtbar. Um einen Abschnitt hinzuzufügen, klicken Sie auf das Dropdown-Menü "Eigenschaft auswählen" am unteren Rand des Konfigurators. Eine vollständige Liste der einzelnen Eigenschaften, die zur Laufzeit im Code angegeben werden können, finden Sie in der Ui API Dokumentation.
Layout
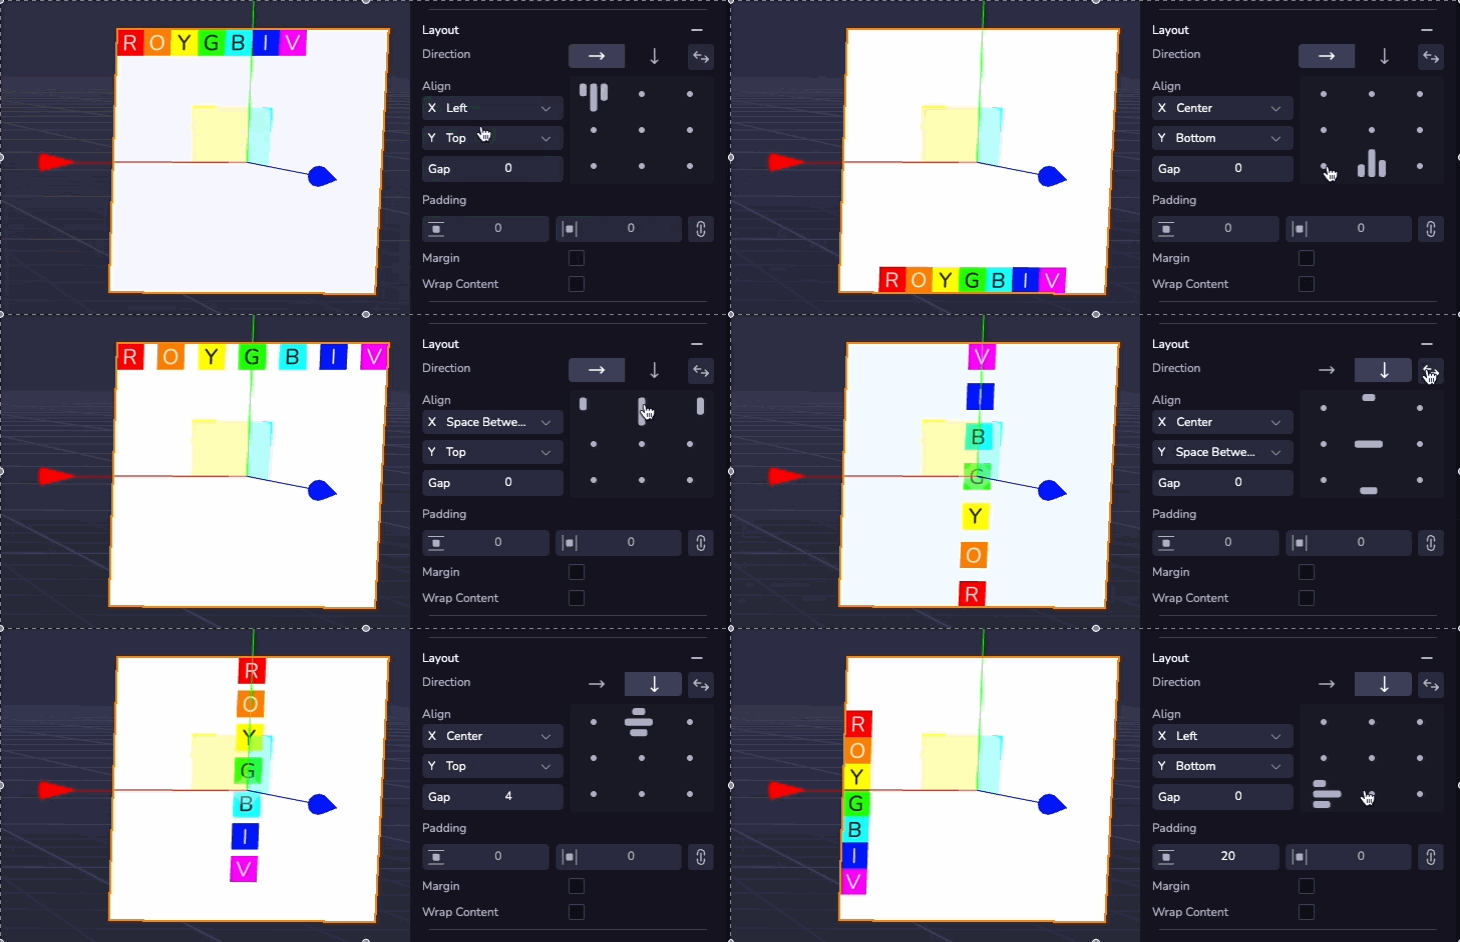
Verwenden Sie den Layout-Konfigurator, um zu steuern, wie untergeordnete Elemente positioniert werden. Die verschiedenen Ausrichtungseigenschaften ermöglichen dynamische Menüs, die mit wechselnden Inhalten und Bildschirmgrößen umgehen können. Die Reihenfolge, in der die Kinder erscheinen, wird durch ihre Reihenfolge in der Hierarchie bestimmt. Untergeordnete Benutzeroberflächen, die auf "Position absolut" eingestellt sind, werden relativ zum übergeordneten Element fixiert, ohne dessen Layout-Konfiguration zu berücksichtigen.
Text
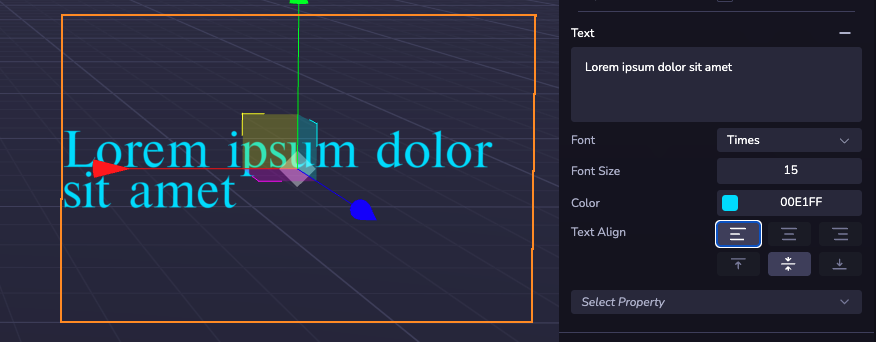
Text kann zu jedem UI-Element hinzugefügt werden. Im Textbereich können Sie den Inhalt, die Schriftart, die Größe, die Farbe und die Ausrichtung konfigurieren. Text, der die Breite des Elements überschreitet, wird automatisch in eine neue Zeile umgebrochen.
Hintergrund & Rand
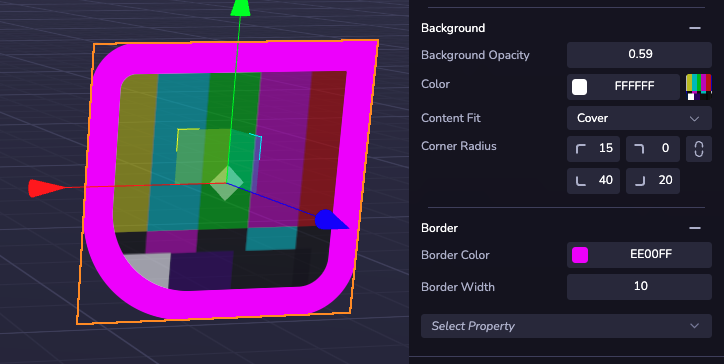
Der visuelle Stil eines UI-Elements wird durch die Abschnitte Background und Border gesteuert. Hier können Farben und Transparenz konfiguriert werden, und ein Bild kann von einer Web-URL oder Projekt-Assets übernommen werden.
Interaktion
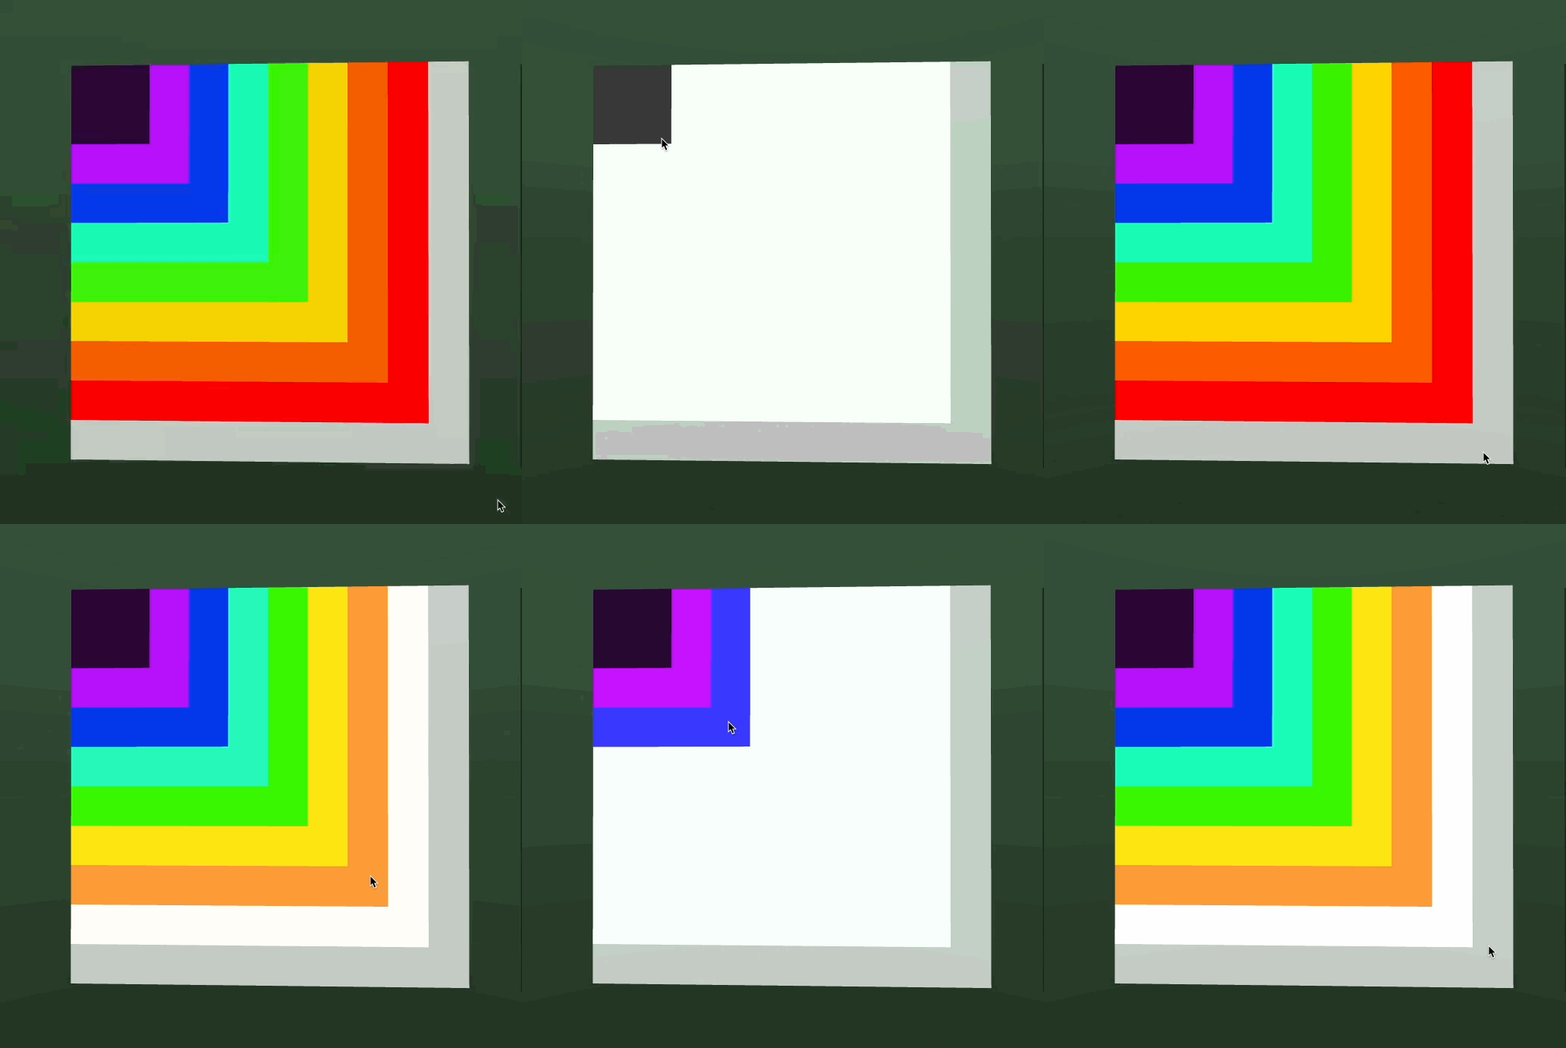
Sie können funktionale Schaltflächen mithilfe einer benutzerdefinierten Komponente mit einem Ereignis-Listener erstellen. UI-Elemente unterstützen Klick-/Tipp-Ereignisse sowie Hover-Zustände. Eine umfassende Liste der unterstützten Ereignisse und Beispielcode finden Sie in der Input Events API Documentation. Diese arbeiten mit Overlay- und 3D-UI-Elementen.
Ein Klick wird nur auf das oberste Element an der Zeigerposition ausgelöst. Die Schichtung wird durch die Reihenfolge der Hierarchie gesteuert, wobei spätere Geschwister über früheren erscheinen. Mit der Option "Stapelreihenfolge" am oberen Rand des Konfigurators können Sie Gruppen von Oberflächenelementen in einer benutzerdefinierten Reihenfolge anordnen.
Aktivieren Sie die Eigenschaft "Ignoriere Raycast" für dekorative, unsichtbare oder nur bildschirmfüllende Rahmen, um zu verhindern, dass sie die Benutzereingabe von interaktiven Elementen blockieren, die darunter liegen können.
Schriftarten
Standard-Schriftarten
Für jedes 8th Wall-Projekt steht eine Auswahl an integrierten Schriftarten zur Verfügung.
Nunito
Akidenz Grotesk
Baskerville
Futura
Gotham
Helvetica
Nanum Pen Script
Press Start 2P
Times
Inconsolata
Benutzerdefinierte Schriftarten
Sie können auch benutzerdefinierte Schriftarten über TTF-Dateien hochladen, um sie in Ihren UI-Elementen zu verwenden. Laden Sie Schriftdateien zu Ihren Assets hoch, um sie automatisch für jede Benutzeroberfläche in Ihrem Projekt verfügbar zu machen.