Objetivos de imagen
Introducción
Los objetivos de imagen le permiten establecer una forma plana, cilíndrica o cónica como disparador o marcador para superponer contenido AR.
Activación de objetivos de imagen
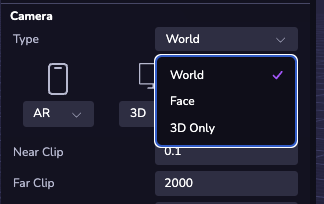
Para activar objetivos de imagen en su proyecto, debe utilizar una cámara World.
- Selecciona la Cámara de tu escena
- Establece el Tipo a
Mundo.
Añadir objetivos de imagen
Cargar la imagen de destino
Localice el panel Objetivos de imagen en la parte inferior izquierda de la interfaz de Studio. Haga clic en ( + ) para añadir un objetivo de imagen plano, cilíndrico o cónico.

Configuración del destino de la imagen
Personalice la región de seguimiento y los metadatos del objetivo de imagen.
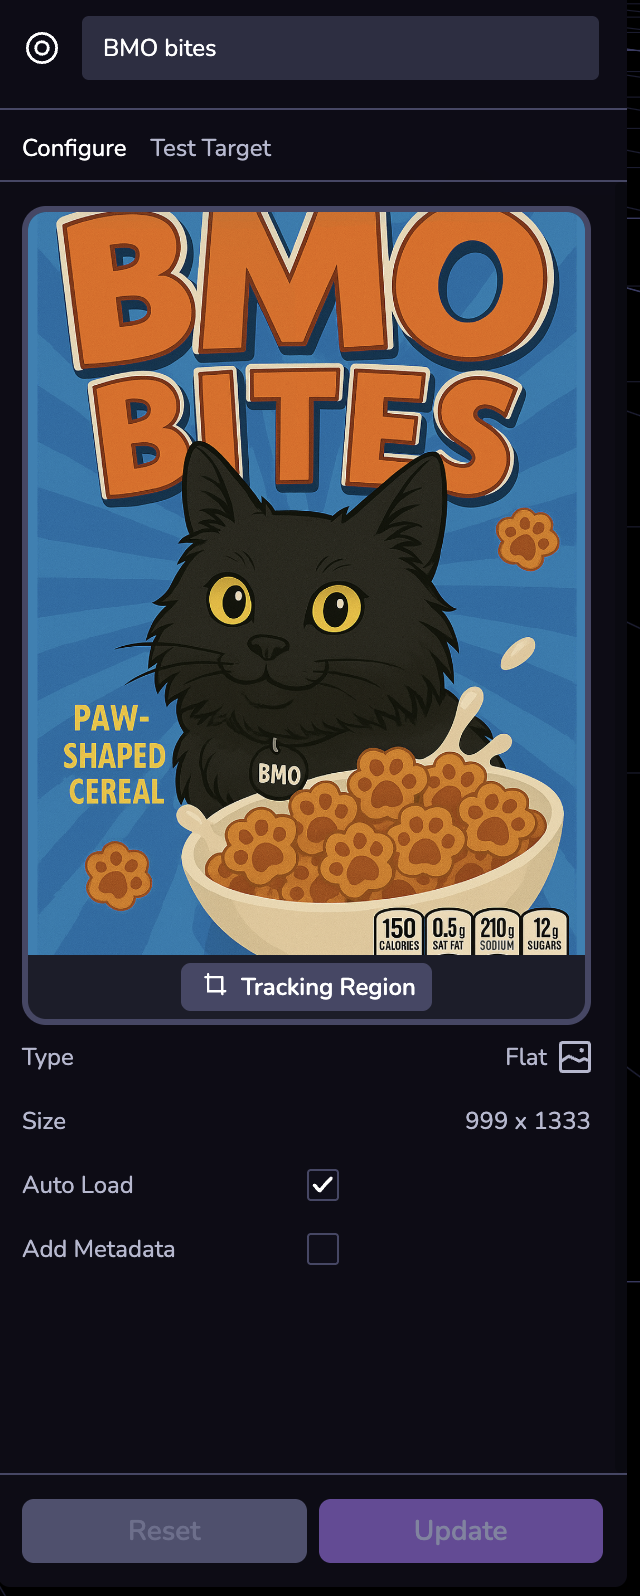
Prueba del objetivo de imagen
Escanee el código QR para comprobar la calidad y el seguimiento del objetivo de la imagen cargada.

Añadir la entidad de destino de imagen
Puedes añadir un objetivo de imagen a tu escena creando una entidad Objetivo de imagen.
Para ello, haga clic en ( + ) en la Jerarquía de escenas y seleccione Objetivo de imagen.
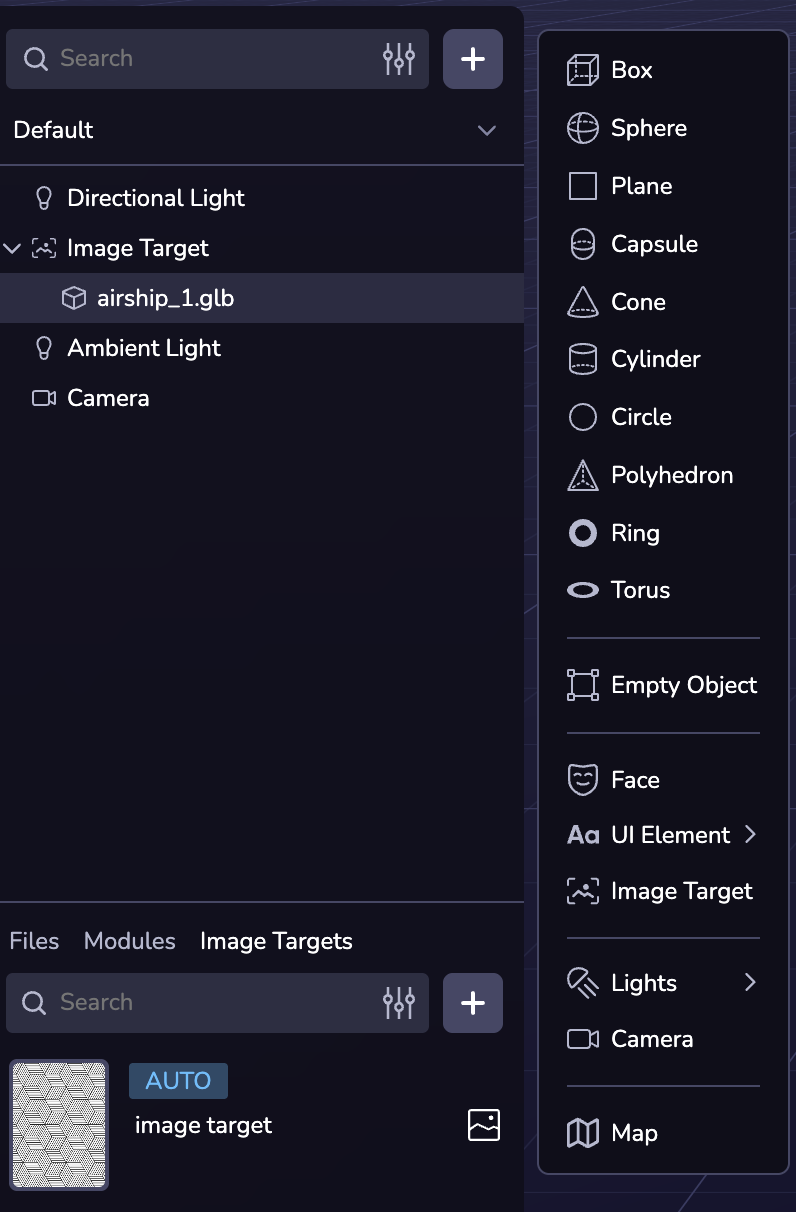
Enlazar el destino de la imagen
Vincula la entidad de destino de imagen a un destino de imagen cargado.

Uso de objetivos de imagen
Cuando añada un objetivo de imagen a su proyecto, aparecerá una malla de objetivo de imagen para que pueda alinear y posicionar otros contenidos 3D contra el objetivo de imagen.
Simulación de objetivos de imagen
El Simulador de Studio te permite probar tu experiencia con el objetivo de imagen de forma remota simulando el movimiento mediante los controles WASD.
Uso del simulador con objetivos de imagen
Para simular el movimiento y la colocación del contenido alrededor de un objetivo de imagen añadido a la escena:
- Asegúrate de que tu Configuración de cámara está en Mundo.
- Pulsa Jugar para abrir el Simulador
- Utilice las Opciones de entorno del simulador (selector inferior izquierdo) para encontrar el objetivo de imagen deseado.
- Utiliza los atajos de teclado WASD para simular el movimiento. (Debe hacer clic primero en el panel Simulador antes de utilizar el teclado)
Teclas de movimiento:
W= AdelanteA= IzquierdaS= Hacia atrásD= DerechaQ= ArribaE= Abajo
Moviéndose alrededor del objetivo de imagen con WASD se activará el evento Imagen Encontrada para simular un seguimiento exitoso del objetivo de imagen.