インターフェイスの操作
Studioは、数多くの異なるツールやビューで構成されたリッチなエディタインターフェイスを特徴としており、 、それぞれプロジェクト開発時に必要不可欠なものです。
以下のセクションでは、Studio エディターの主なインターフェイス要素を紹介し、基本的な機能を にハイライトしています。
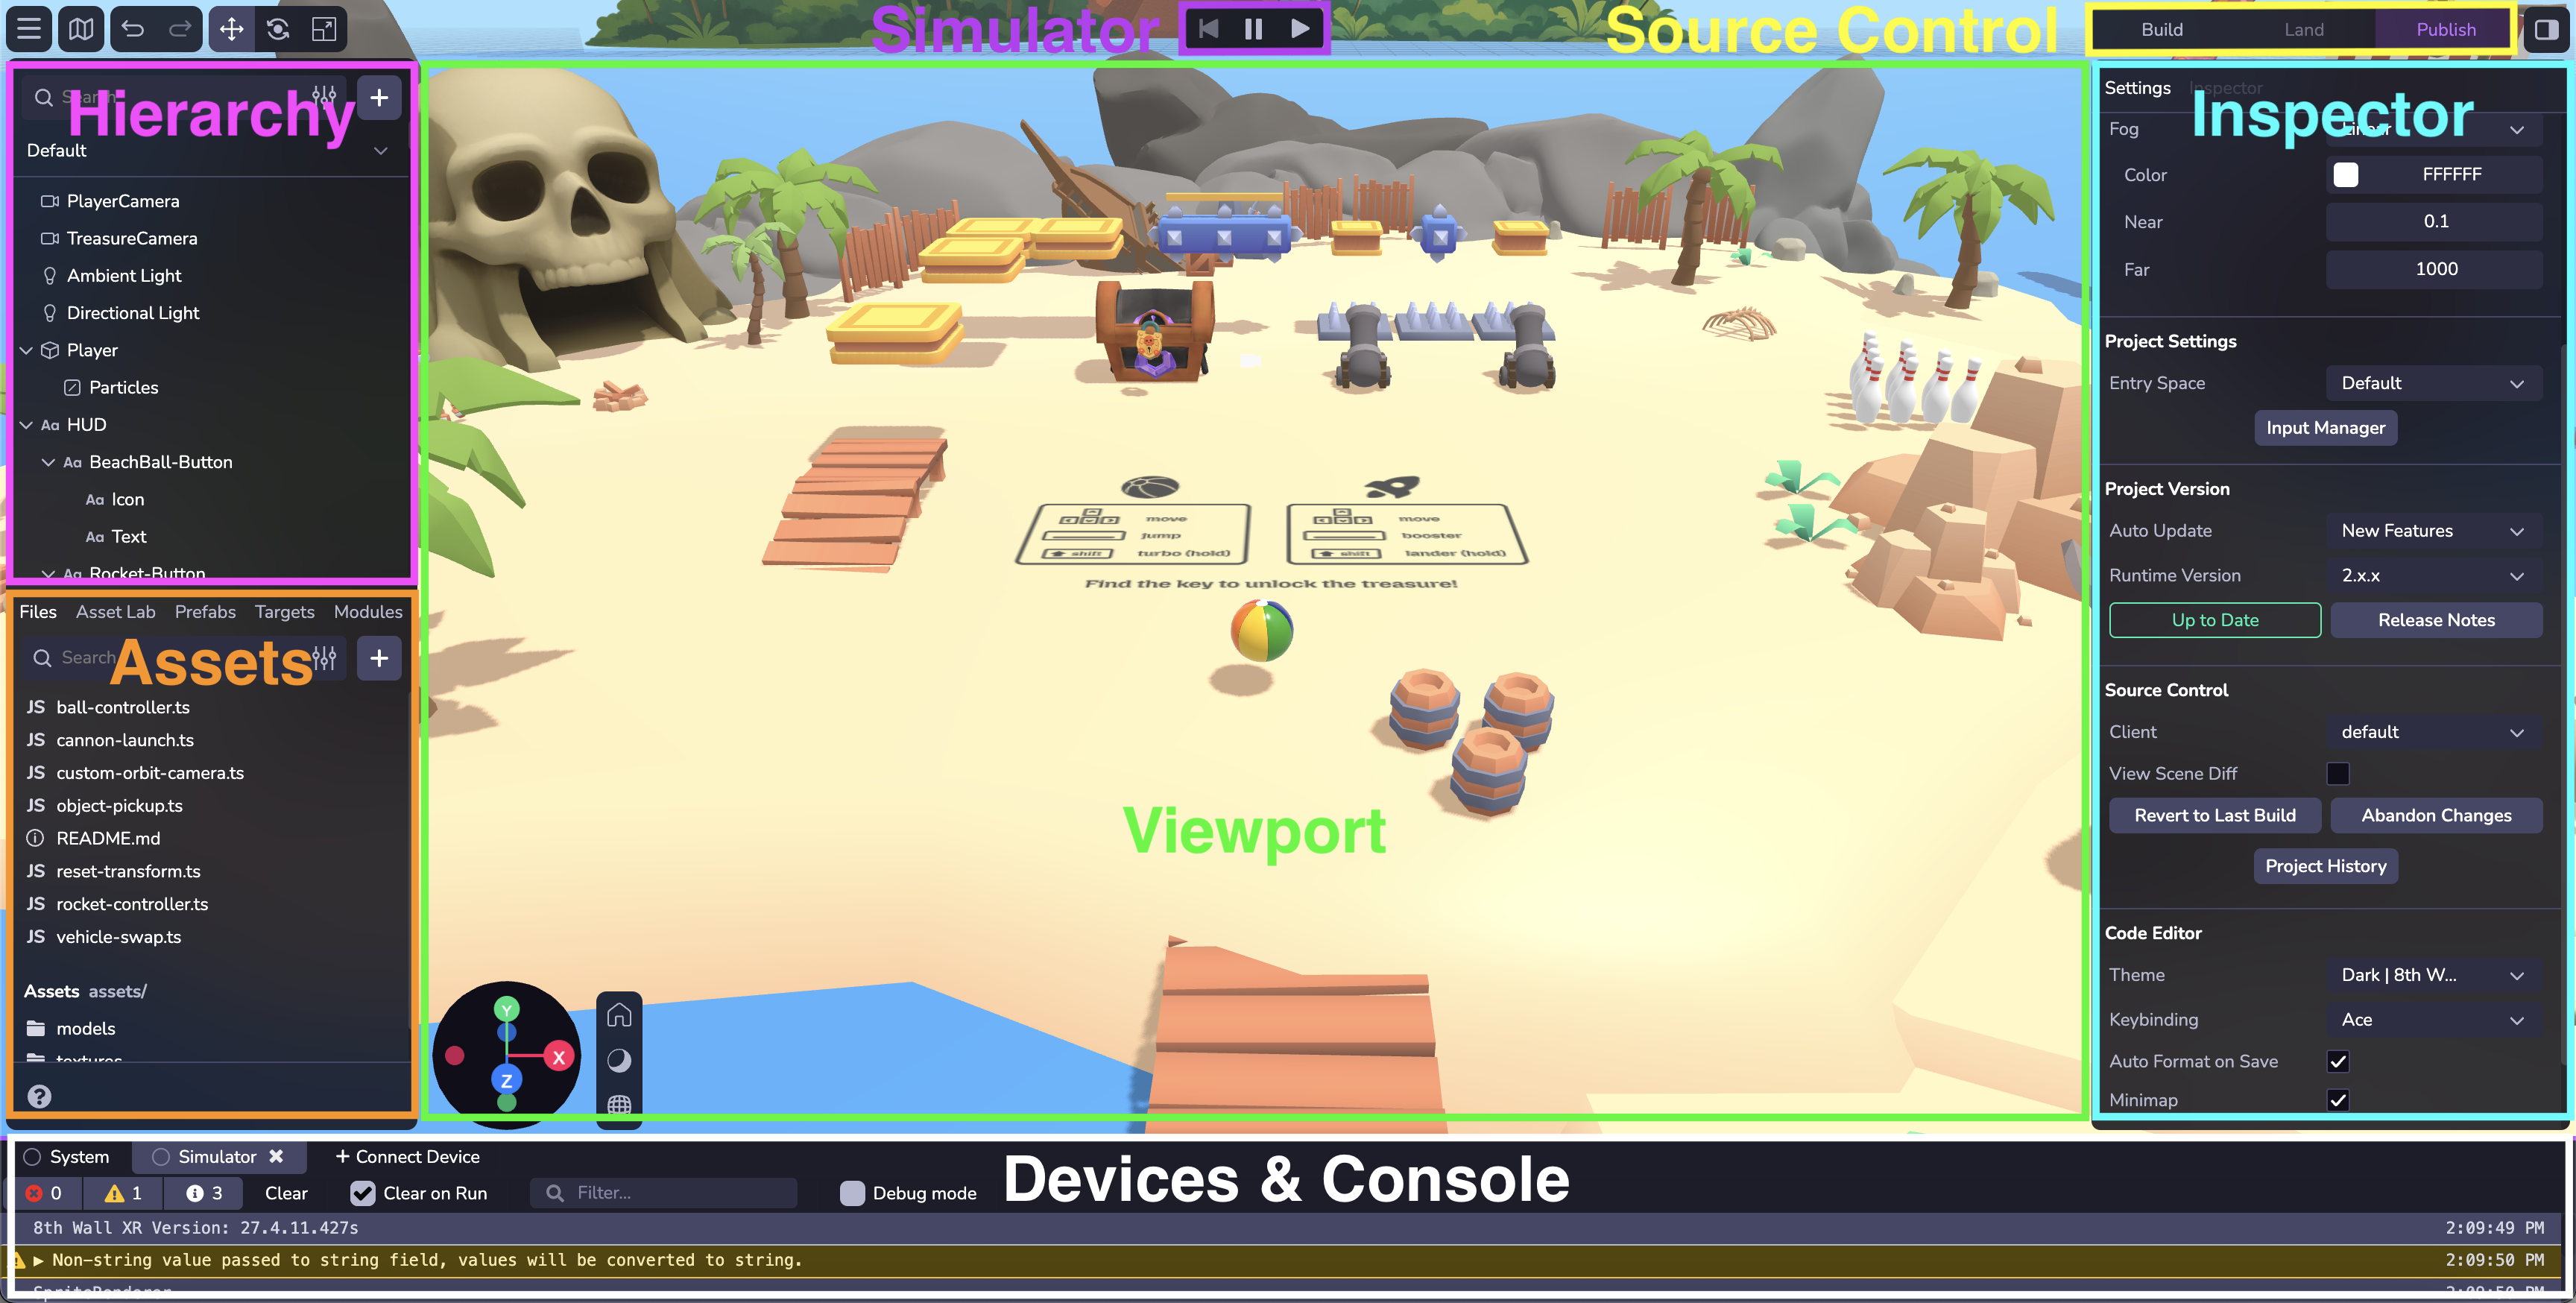
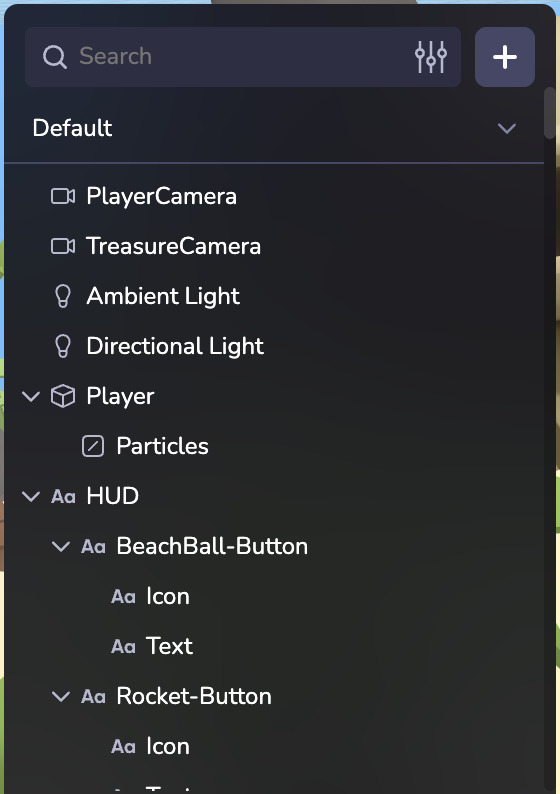
ヒエラルキー
空間に含まれるエンティティやオブジェクトを表示し、それらの入れ子を変更する。 オブジェクトをクリックして階層内の別の位置にドラッグすると、再ペアレントまたは アンペアレントできます。 右クリックで オブジェクトを複製または削除。 スペースに新しいオブジェクトを追加します。 さまざまなオブジェクトの検索とフィルタリング。
資産
ファイル&アセットは左下のパネルから管理できます。
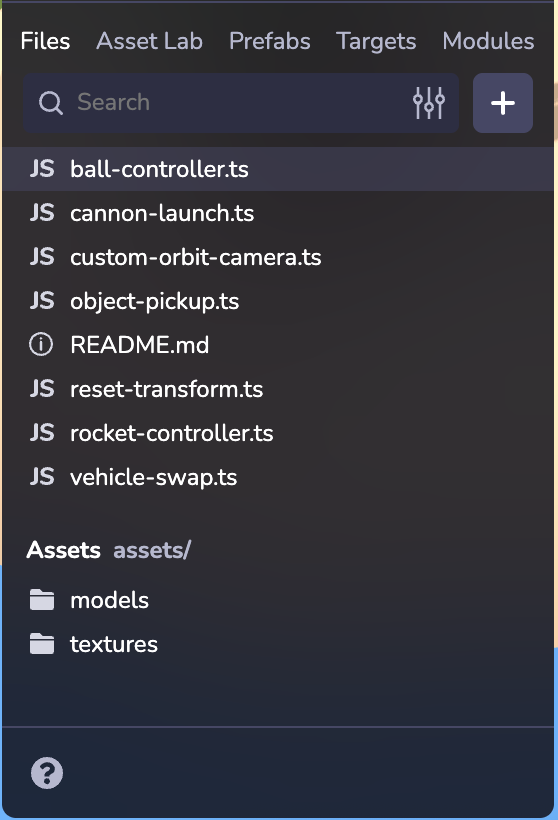
ファイル
独自の3Dモデル、2D画像、オーディオ ファイル、カスタムスクリプトなどをアップロードできます。 フォルダを作成し、ファイルをドラッグして配置を再編成します。 、アセットをビューポートまたは階層にドラッグ&ドロップして、エンティティをシーンに追加することもできます。 GLB/GLTFフォーマットの3Dモジュールの使用と最適化については、Your 3D Models on Webをご覧ください。
アセット・ラボ
Asset Labを使って画像、3Dモデル、アニメーション化されたキャラクタ、リギングされたキャラクタを生成し、 Asset Labライブラリにアクセスして、アセットをプロジェクトに簡単にインポートできます。 アセット・ラボについて詳しくはこちら。
�プレハブ
再利用可能でカスタマイズ可能なゲームテンプレートを作成することで、開発を効率化し、規模を拡大できます。 プレハブについてもっと知る。
ターゲット
プロジェクトのイメージターゲットをアップロードし、管理します。 イメージターゲットについて詳しくはこちら。
モジュール
8thウォール・モジュールは、 プロジェクト開発の効率を劇的に高めるために設計された強力な8thウォール機能です。 8thウォール・モジュールは、 プロジェクト開発の効率を劇的に高めるために設計された強力な8thウォール機能です。 8th Wallモジュールにより、ワークスペース内のコンポーネント(コード、アセット、ファイル) を保存して再利用したり、8th Wallで作成されたモジュールを見つけてプロジェクトにインポートしたりすることができます。 8thウォール・モジュールは、 プロジェクト開発の効率を劇的に高めるために設計された強力な8thウォール機能です。 8th Wallモジュールにより、ワークスペース内のコンポーネント(コード、アセット、ファイル) を保存して再利用したり、8th Wallで作成されたモジュールを見�つけてプロジェクトにインポートしたりすることができます。 一般的なモジュールについての詳細は、 第8壁モジュールの概要をご覧ください。
ビューポート
空間にオブジェクトや照明を追加、配置、更新、操作する。 下部のパースペクティブ ギズモを使用して、シーンのビューを変更し、ライティングとシャドウの可視性を変更し、 オルソグラフィックビューからパースペクティブビューに切り替えます。 上部のツールバーを使って、 選択したオブジェクトの位置、回転、スケールを変更したり、編集を元に戻したりやり直したりします。

ショートカット
| 機能 | キーボードショートカット |
|---|---|
| カメラ軌道 | 左クリック+ドラッグ |
| カメラパン | 右クリック+ドラッグ、右クリック+ドラッグ、中クリック+ドラッグ |
| カメラズーム | スクロールホイール |
| 選択オブジェクトにフォーカス | F |
| 翻訳する | W |
| 回転 | E |
| スケール | R |
| UIレイヤーの非表示/表示 | ⌘\ |
| オブジェクトの削除 | 削除 |
| 重複 | ⌘D |
| コピーオブジェクト | ⌘C |
| オブジェクトの貼り付け | ⌘V |
| 元に戻す | ⌘Z |
| やり直し | ⌘⇧Z, ⌘Y |
シミュレーター
シミュレーターを起動してシーンを再生する。 スペース内のエンティティに編集を加えることができ、 、シミュレータに即座に反映されます。 また、シミュレーターでは、Studioにいながらにして、さまざまなデバイスのビューポート・サイズや、 シミュレートされた実環境で、プロジェクトの変更をテストして確認することができます。
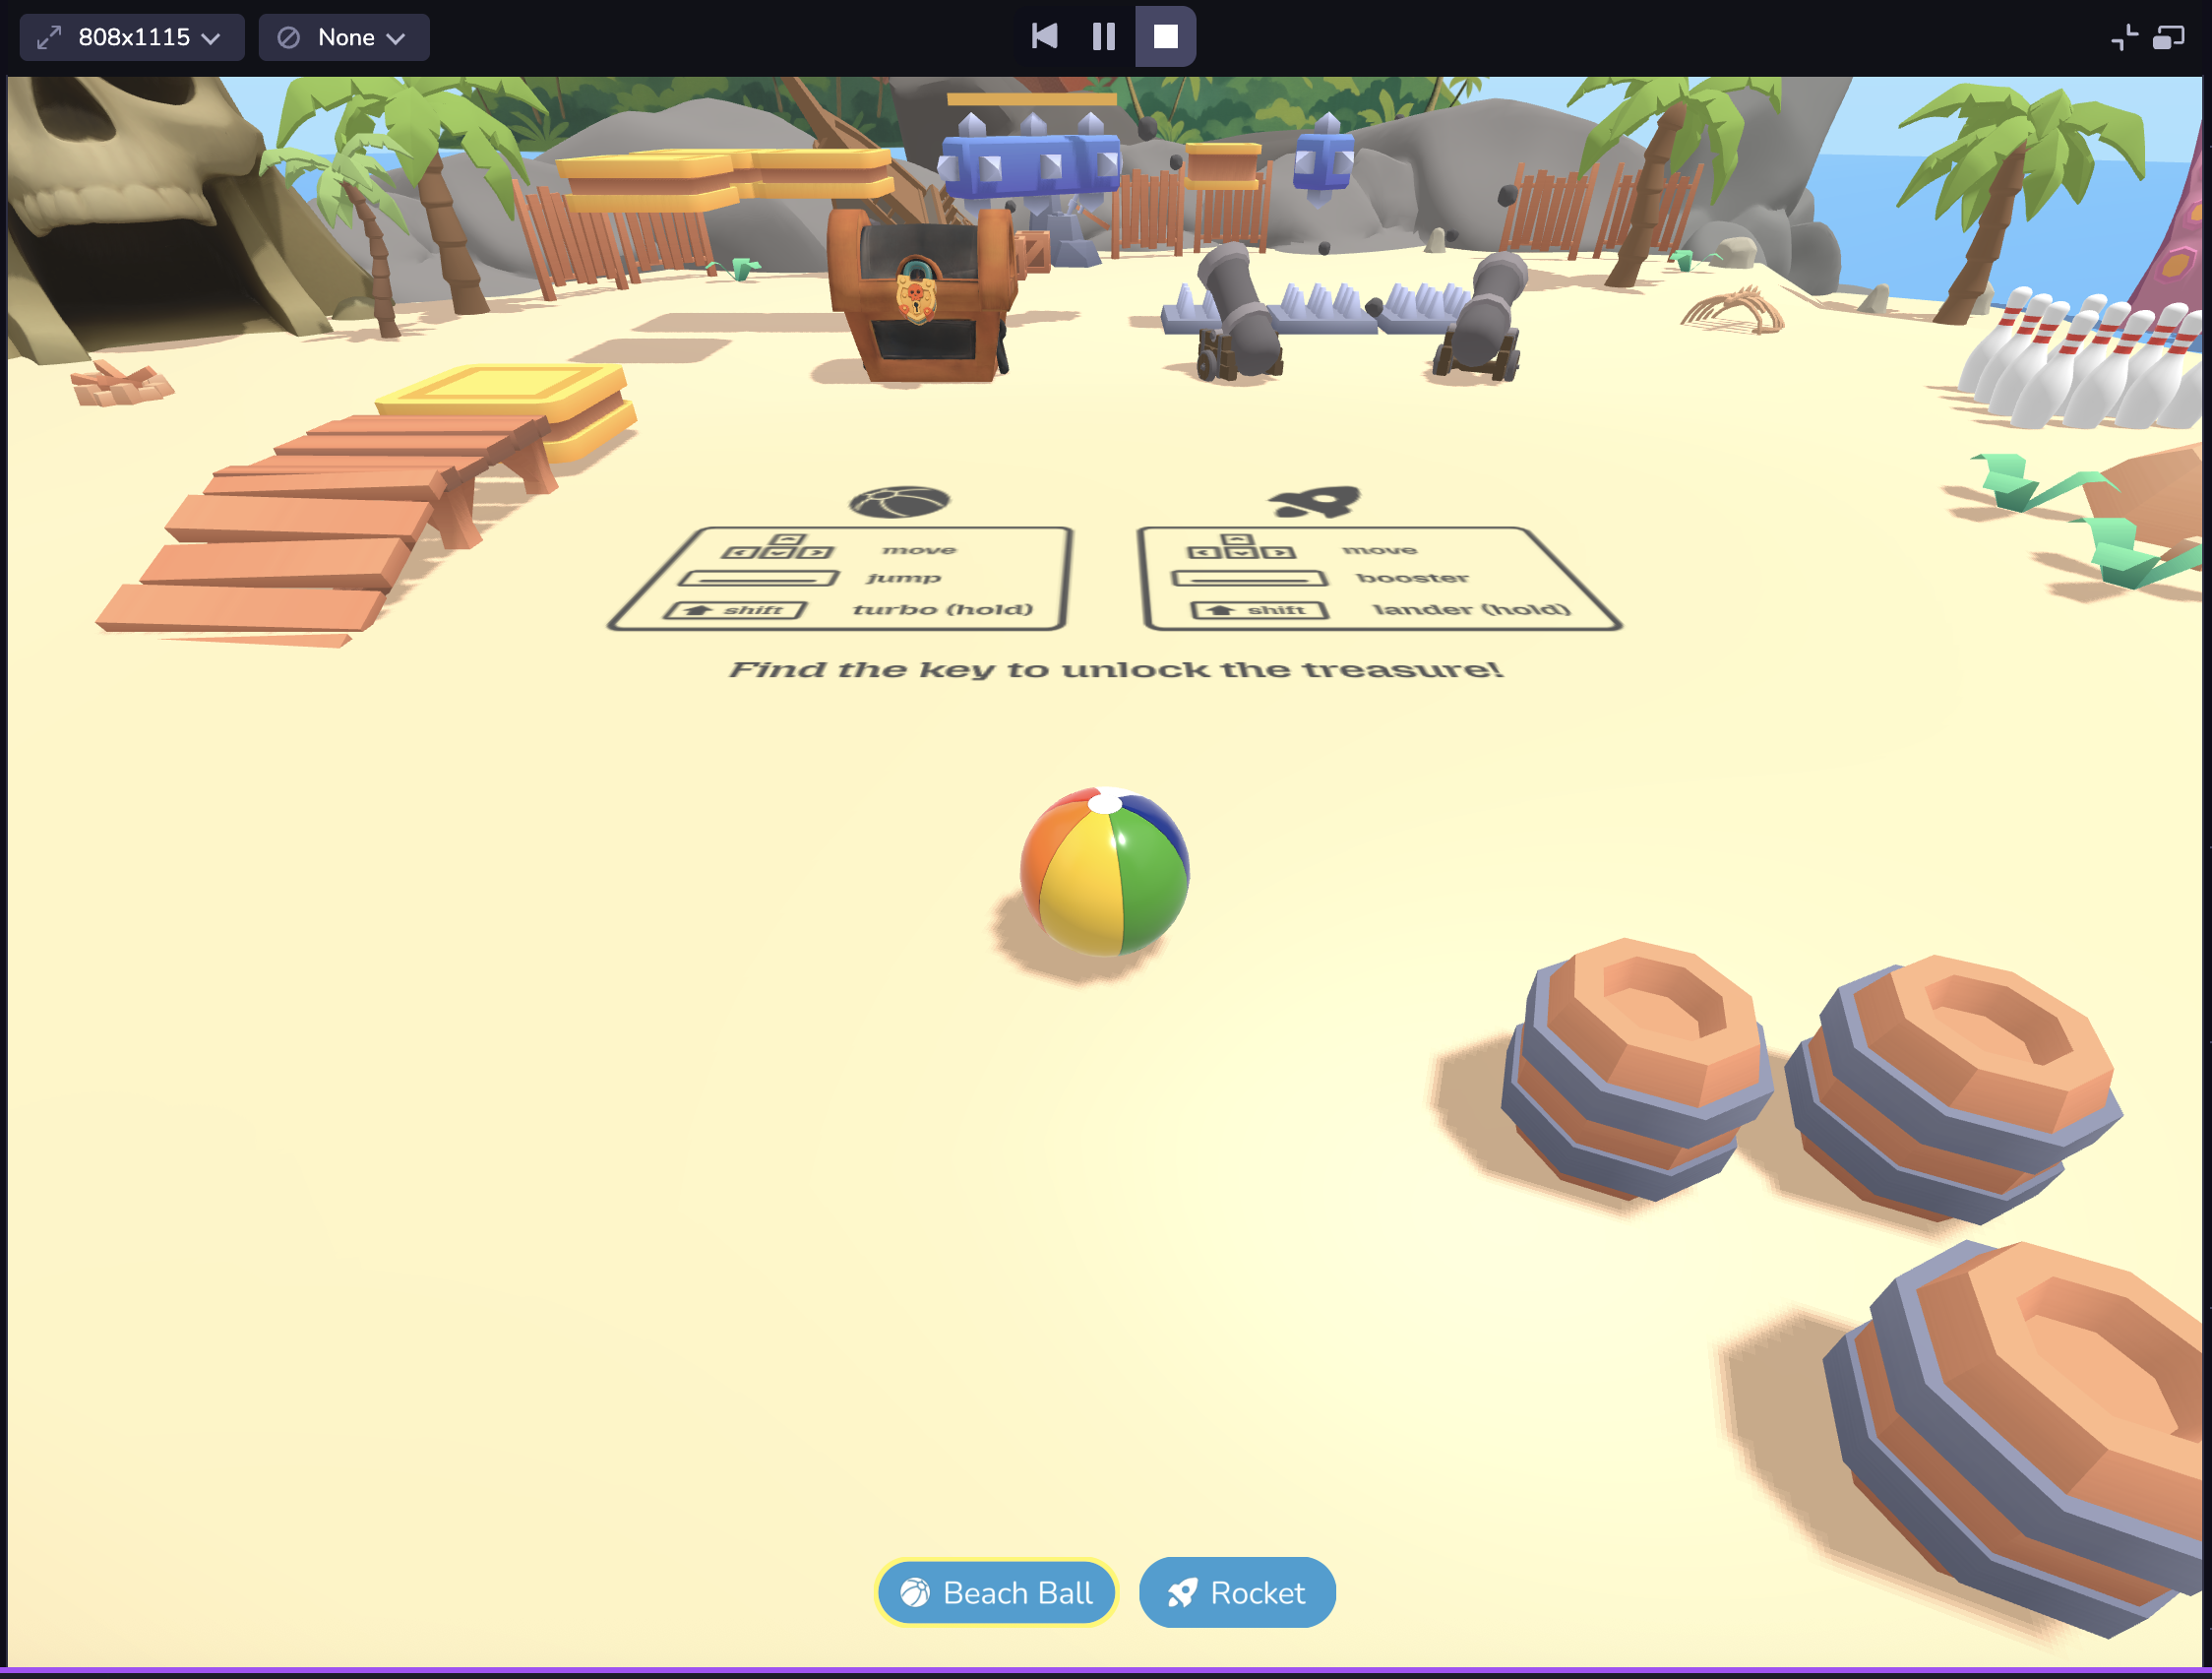
ARを開発している場合、録画済みのカメラシーケンス集にアクセスできる。 ARシミュレーターには、 のような再生コントロールや便利な機能が多数ある:
- プレイバー、スクラバー、イン/アウトハンドル:ループ・ポイントを設定し、選択したシーケンスの を細かくコントロールできる。
- Recenterボタン(右下):カメラ映像を原点に戻します。 注:Recenter は、シーケンス��がループするたびに、また新しいシーケンスが選択されるたびに、 呼び出される。
ツールバー起動
しかし、 開発の重要な段階は、手動でプロジェクトをビルドし、変更をコミットとしてランディングし、 プロジェクトを公開することでマークできます。

**ビルドBuildをクリックすると、作業が保存され、プロジェクトの新しいクラウドビルドが開始されます。
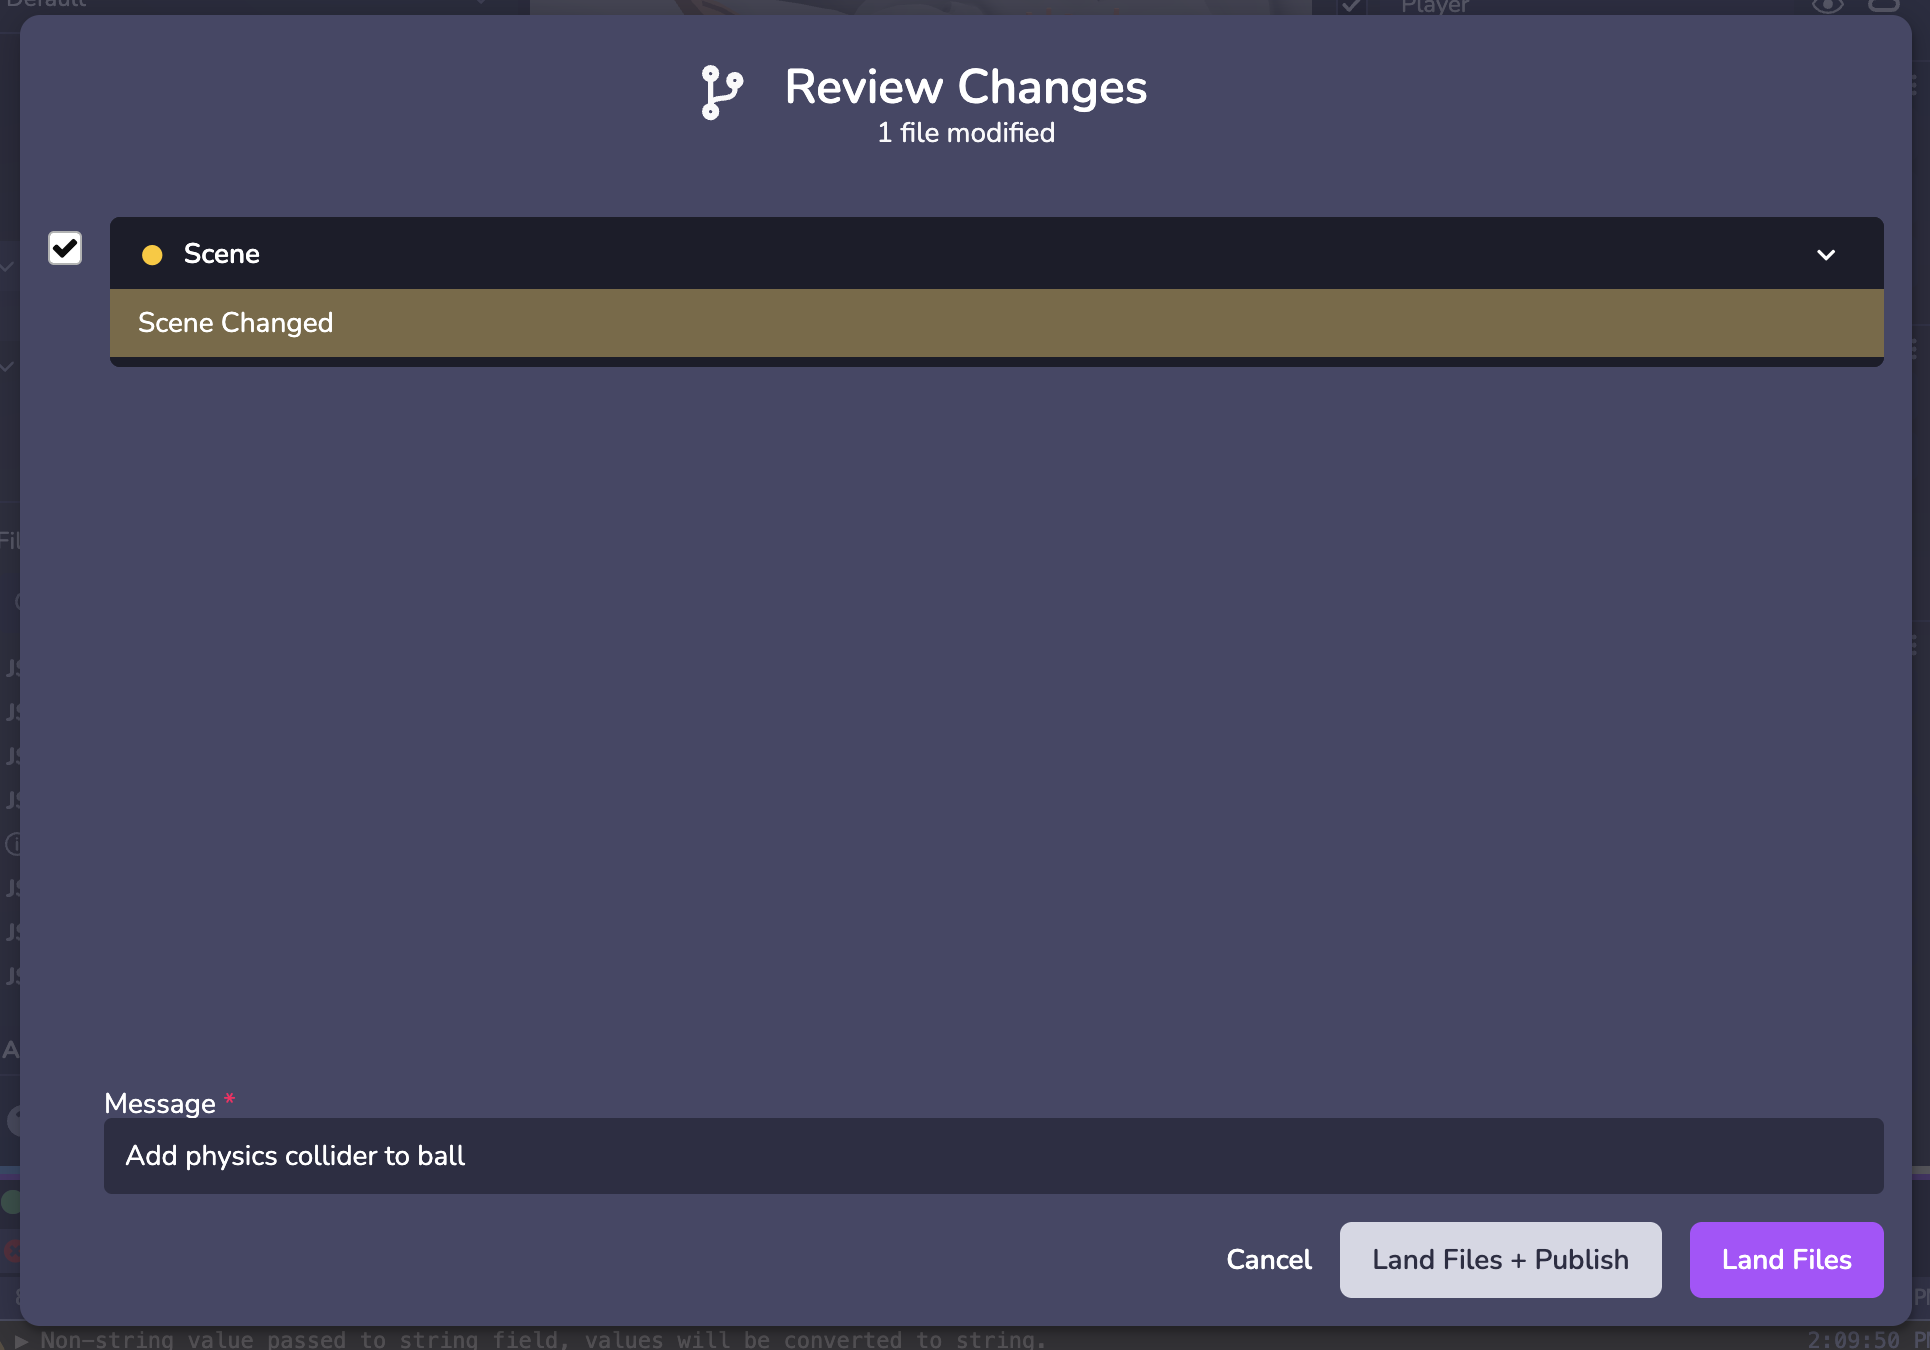
着陸または同期:変更に満足したら、更新されたコードを Studio* の統合ソース管理( )に取り込みます。 Studioウィンドウの右上にあるLandをクリックします。 ボタンは緑色になり、 、プロジェクトにまだソースコントロールにランディングされていない変更があることを示します。 着陸または同期:変更に満足したら、更新されたコードを Studio* の統合ソース管理( )に取り込みます。 Studioウィンドウの右上にあるLandをクリックします。 ボタンは緑色になり、 、プロジェクトにまだソースコントロールにランディングされていない変更があることを示します。 "Sync"(同期)は、あなたのプロジェクトが、ソース コントロールにある最新のランディングされた変更と最新でないことを示します(例:別のチームメンバーがプロジェクトの変更をソースコントロールにランディングした)。
**公開する:最後のステップは、8th Wallの ビルトインホスティングを使用して、更新されランディングされたプロジェクトコードを公開することです。 Publicでは、インターネット上の誰でもがプロジェクトを公開閲覧できる。 ステージング パスコードを持っている人は、あなたのプロジェクトを見ることができます。 Publicでは、インターネット上の誰でもがプロジェクトを公開閲覧できる。 ステージング パスコードを持っている人は、あなたのプロジェクトを見ることができます。
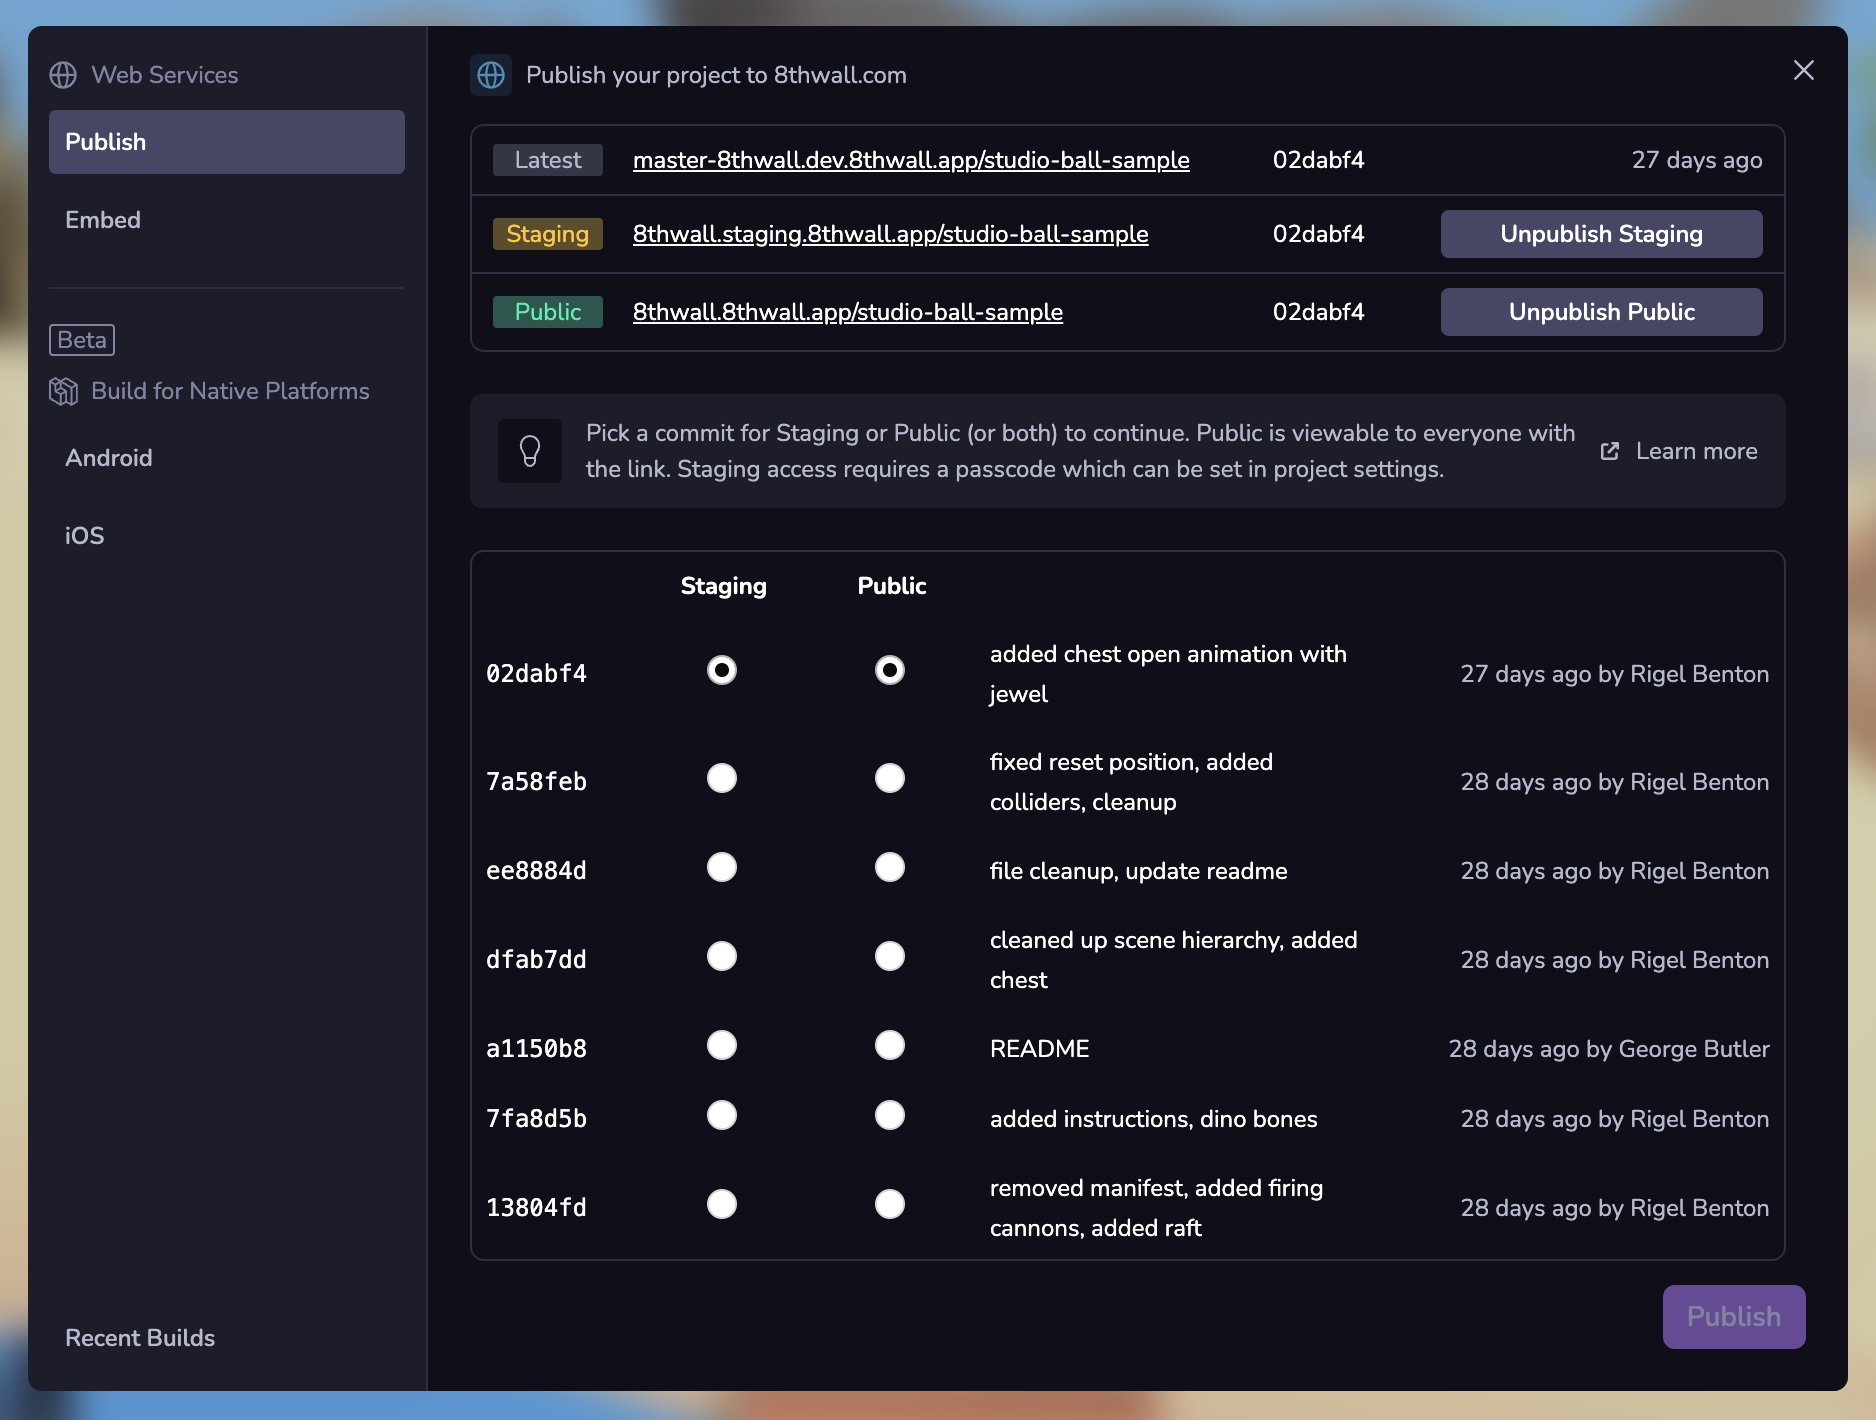
プロジェクトを公開する準備ができたら、説明文とカバー画像が必要です。 プロジェクトを一般公開する方法については、 Publish your project セクションをご覧ください。
設定とインスペクター
オブジェクト固有のコンポーネントを表示および設定し、エディタ全体の設定を調整します。
スペース設定
エンテ�ィティが選択されていない場合**、プロジェクトの一般設定が表示されます。
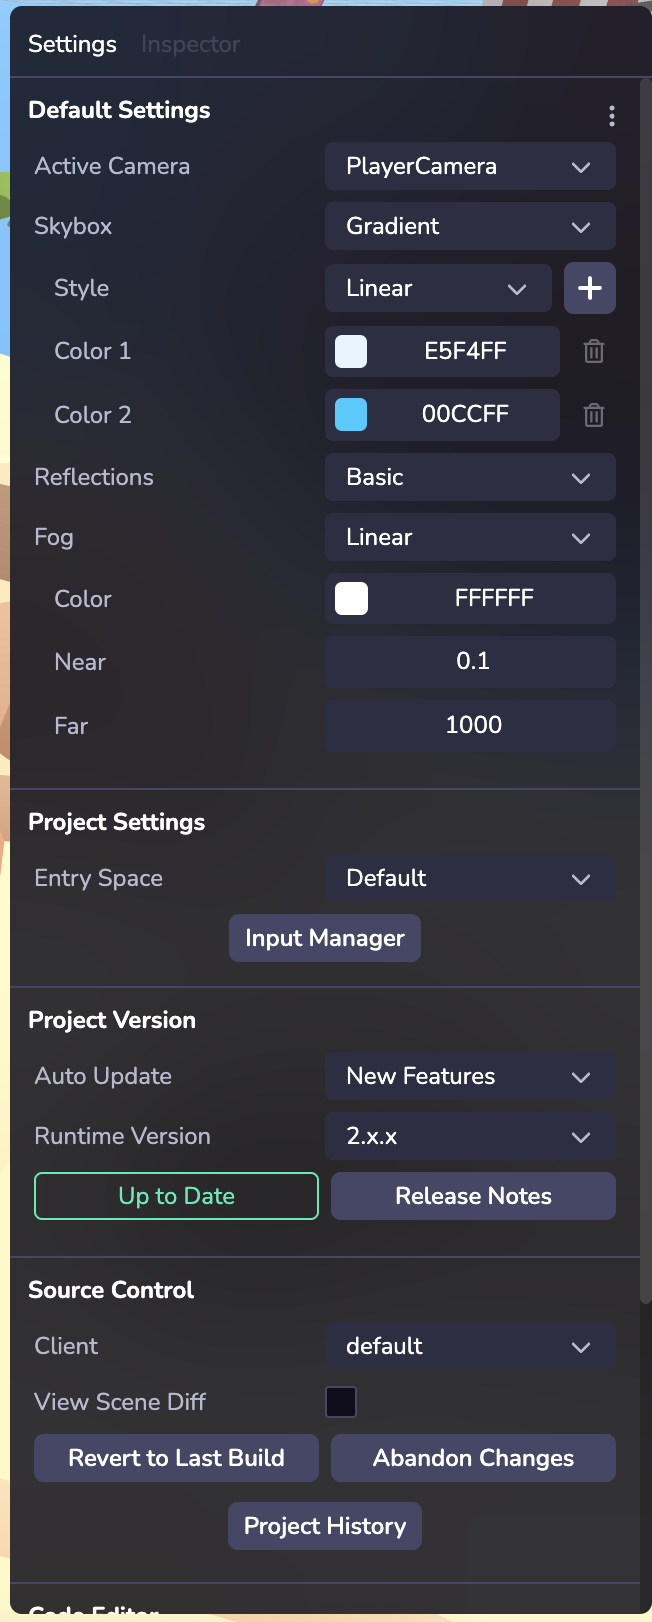
デフォルト設定
スカイボックスやフォグなどの設定で空間をスタイリッシュに。 スカイボックスをスタイリッシュに スカイボックスは、ジオメトリを超えた世界( )がどのように見えるかを示す、シーン全体のラッパーです。 プロジェクトがAR互換デバイスでARを使用するように設定されている場合、 (XRを参照)スカイボックスはレンダリングされません。 プロジェクトがAR互換デバイスでARを使用するように設定されている場合、 (XRを参照)スカイボックスはレンダリングされません。
プロジェクト設定
複数のスペースがある場合は、どのスペースをエントリースペースにするかを選択します。
入力マネージャを使用して、 キーボード、ゲームパッド操作、トラックパッド、タッチスクリーン操作など、さまざまなデバイス入力で動作するエクスペリエンスを設定します。 イベントアクションを作成し、 、異なる入力へのマッピン��グ(またはバインディング)を設定します。 入力システムについて詳しくはこちら
プロジェクト・バージョン
スタジオ・プロジェクトは特定のランタイム・バージョンで実行でき、ここで選択できます。 プロジェクトを固定されたランタイムに固定して予測可能にしたり、自動的なマイナーアップデートやバグフィックスを選んで常に最新の状態に保つこともできます。
ソース管理
プロジェクトの異なるバージョンと変更履歴を管理します。 新しいクライアントを作成すると、プロジェクトの新しい バージョンが作成されます。これは、メインの バージョンに影響を与えずに変更をテストするのに便利です。 また、 Project History 機能を選択することで、プロジェクトの過去の Landed Change の履歴にアクセスすることができます。 新しいクライアントを作成すると、プロジェクトの新しい バージョンが作成されます。これは、メインの バージョンに影響を与えずに変更をテストするのに便利です。 また、 Project History 機能を選択することで、プロジェクトの過去の Landed Change の履歴にアクセスすることができます。
コードエディター
明暗モード、キーバインド、コード保存設定など、さまざまなユーザビリティ設定を選択できます。
インスペクター
エンティティとそのコンポーネントを検査し、構成する。 エンティティとコンポーネントについては、Overviewを参照してください。
デフォルトでは、すべてのエンティティはInspectorにTransformコンポーネントを表示します。 例えば、プリミティブは、ジオメトリの形状設定、マテリアル、テクスチャなどの 設定可能なオプションを持つメッシュコンポーネントを表示します。 例えば、プリミティブは、ジオメトリの形状設定、マテリアル、テクスチャなどの 設定可能なオプションを持つメッシュコンポーネントを表示します。
コンポーネント
新規コンポーネント」ボタンを使ってコンポーネントを追加できます。 Studioには、Physics、Lighting、Audio、Animationsなど、いくつかのタイプの組み込みコンポーネント( )があります。 カスタム・コンポーネント を追加することもできます - カスタム・コンポーネントの詳細。 一度セットアップすると、カスタム・コンポーネントがカスタ�ム・カテゴリーに表示されます。 コンポーネントを削除するには、3つの点をクリックします。

デバイス&コンソール
コネクト・デバイス
複数のデバイスでプロジェクトをテストすることで、 、さまざまな画面サイズやプラットフォームで一貫したエクスペリエンスをユーザーに提供できます。
リンク/QRコードで 、モバイル、デスクトップ、ヘッドセットデバイス、または別のブラウザウィンドウでプロジェクトを即座にプレビュ��ー。

- Studioインターファクトの下部で、Connect Deviceボタンをクリックします。
- モバイル機器でQRコードをスキャンしてウェブブラウザを開き、プロジェクトをテストしてください。 またはQRコードをクリックして、デスクトップのブラウザで新しいタブを開いてください。
- ページがロードされると、プロジェクトがWebARを使用している場合、モーションセンサーと オリエンテーションセンサー(一部のデバイス)、カメラ(すべてのデバイス)へのアクセスを求めるプロンプトが表示されます。 Allow for all permission プロンプトをクリックします。 プロジェクトの非公開開発URLに移動します。
- 注:「プレビュー」QRコードは、一時的な1回限りのQRコードです。 、開発者がStudioでアクティブに開発している間のみ使用できます。 このQRコードは、 、非公開の開発用URLにアクセスする。 あなたの作品を他の人と共有するには、 、以下の「プロジェクトの公開」のセクションをご覧ください。
- ヘッドセットアイコンをクリックして、ヘッドセットデバイス用のリンクを生成します。
コンソール
プロジェクトのビルドアクションとランタイムをデバッグする。 デバッグ・モードは、 ロギング、パフォーマンス情報、および強化されたビジュアライゼーションをデバイス上��で直接提供する、Studio の高度な機能です。

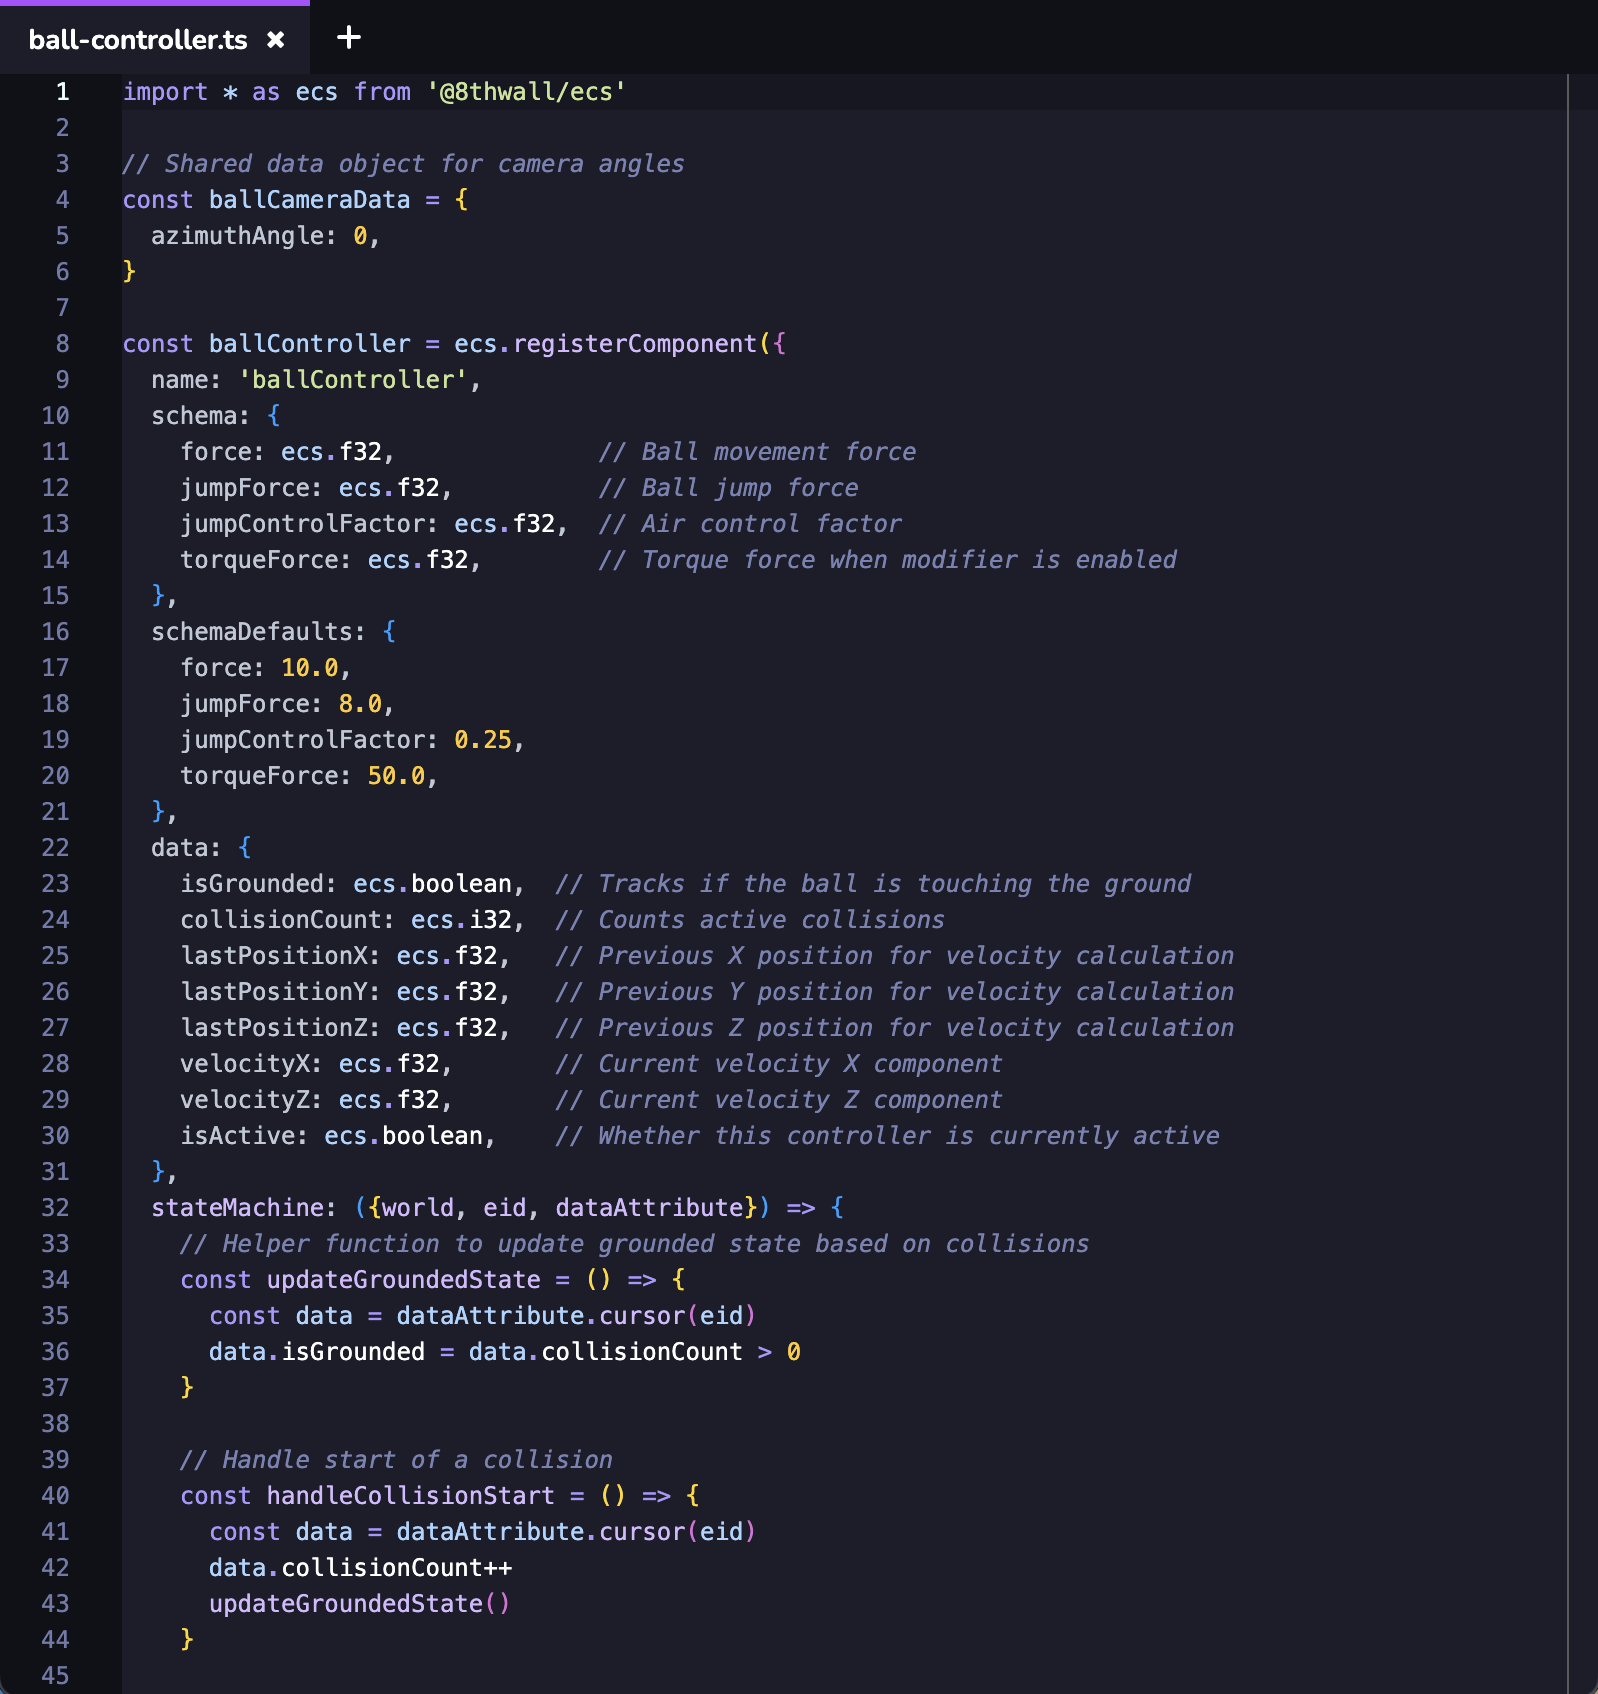
コードエディター
第8回ウォール・コード・エディターは、開発者がウェブベースのXRコンテンツを作成、共同作業、 公開するためのコーディング・ツール一式を備えています。 当社の強力なIDEには、コードエディタ、統合ソース管理、 コミット履歴、ライブプレビュー、ワイヤレスリモートデバッグ、グローバルCDN上のプッシュボタンホスティングが含まれます。 その他のコードエディター機能は以下の通り: 当社の強力なIDEには、コードエディタ、統合ソース管理、 コミット履歴、ライブプレビュー、ワイヤレスリモートデバッグ、グローバルCDN上のプッシュボタンホスティングが含まれます。 その他のコードエディター機能は以下の通り:
- インテリセンス
- コマンドパレット
- コード・ピーク
- 明暗のテーマ